Docker Compose
Except for a few small shortcuts, this post will demonstrate how to start your own functional Continuous Delivery pipeline for a Node.js project in less than one minute.
The setup currently runs on a single Linux host and the only requirements are default installations of Docker and Docker Compose. The main goal is to demonstrate the concept of the Continuous Delivery process implemented using Docker and Mesos.
Writing proper tests, setting up production ready cluster of Mesos and other complex tasks are out of scope for this post but will come later on. In the future, we are also planning to expand this setup to run on variety of clouds like GCE, AWS and add additional components like Flocker, Weave or Consul.
All the code used in this post can be found at the Container Solutions GitHub: https://github.com/ContainerSolutions/cd_demo
We will use the following tools:
- HelloWorld project in Node.js
- Git
- Jenkins
- Docker
- Docker Registry
- Docker Compose
- Mesos
- Mesosphere Marathon
- Zookeeper for internal use of Mesos and Marathon
Development Environment
Let's begin the journey with a simple HelloWorld application written in Node.js and running in a Docker container.
On the illustration you can see developers working on their local environments and running their build, test and other processes within Docker containers represented by light blue squares. Once their code is ready and tested they will commit it to the central Git repo and the new piece of code will continue its journey towards production.
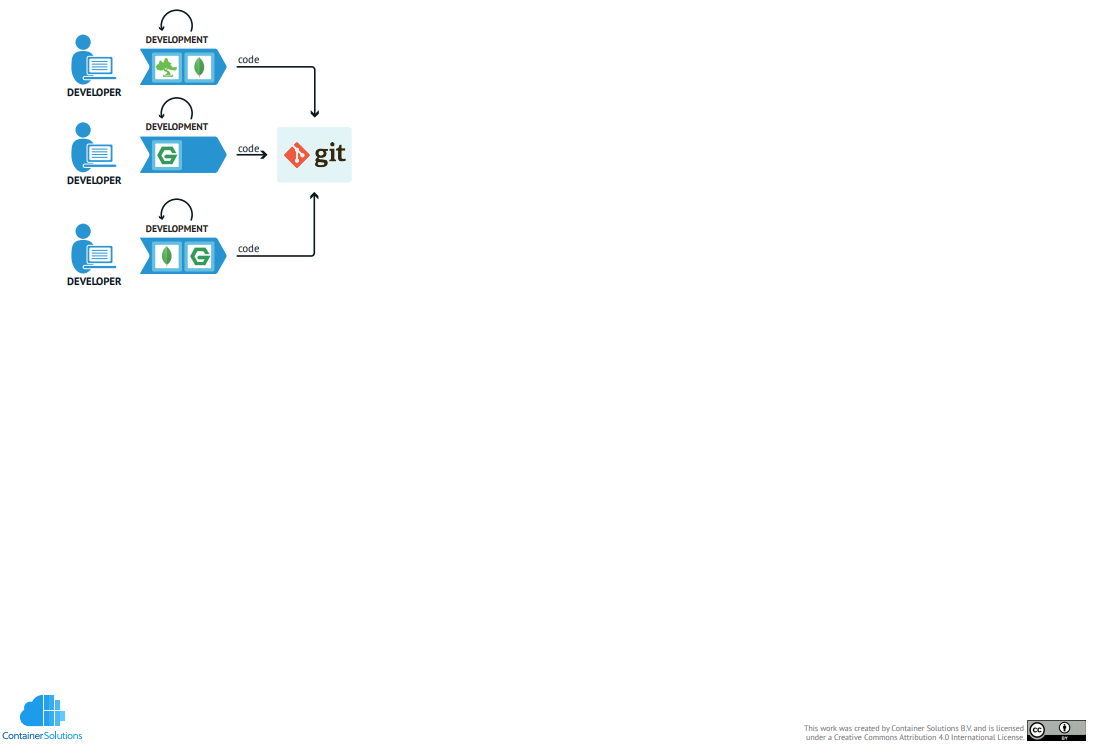
My guess is that if you are reading this article, you won't have too much trouble understanding and implementing this step on your own.
First is the the Node.js application app.js:
// Load the http module to create an http server.
var http = require('http');

// Configure our HTTP server to respond with Hello World to all requests.
var server = http.createServer(function (request, response) {
  response.writeHead(200, {"Content-Type": "text/plain"});
  response.end("Hello World");
});

// Listen on port 8000, IP defaults to "0.0.0.0"
server.listen(8000);

// Put a friendly message on the terminal
console.log("Server running at http://127.0.0.1:8000/");
and its configuration file package.json:
{
  "name": "hello-world",
  "description": "hello world",
  "version": "0.0.1",
  "private": true,
  "dependencies": {
    "express": "3.x"
  },
  "scripts": {"start": "node app.js"}
}
Once we have these two, we can dockerize them by using Google's image for Node.js and adding the following Dockerfile:
FROM google/nodejs

WORKDIR /app
ADD package.json /app/
RUN npm install
ADD . /app

EXPOSE 8000
CMD []
ENTRYPOINT ["/nodejs/bin/npm", "start"]
Our development environment is ready. Now we can build the container and see if the image works.
docker build -t my_nodejs_image .
docker run -p 8000:8000 my_nodejs_image
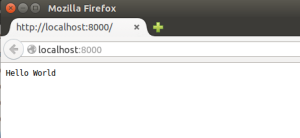
Now you can go to http://127.0.0.1:8000/ and see "Hello World"!
If you change the app.js to show another string, rebuild the image and start a new container, you should be able to see your changes after refreshing the browser.
This setup has absolutely no tests of any type. This is not because I think they are not needed, but because I wanted to simplify the setup and keep the emphasis on Docker and Mesos/Marathon. Any good developer should understand that a development project is not ready for production if there are no tests.
Now we are free to move to the next step.
Continuous Integration/Delivery
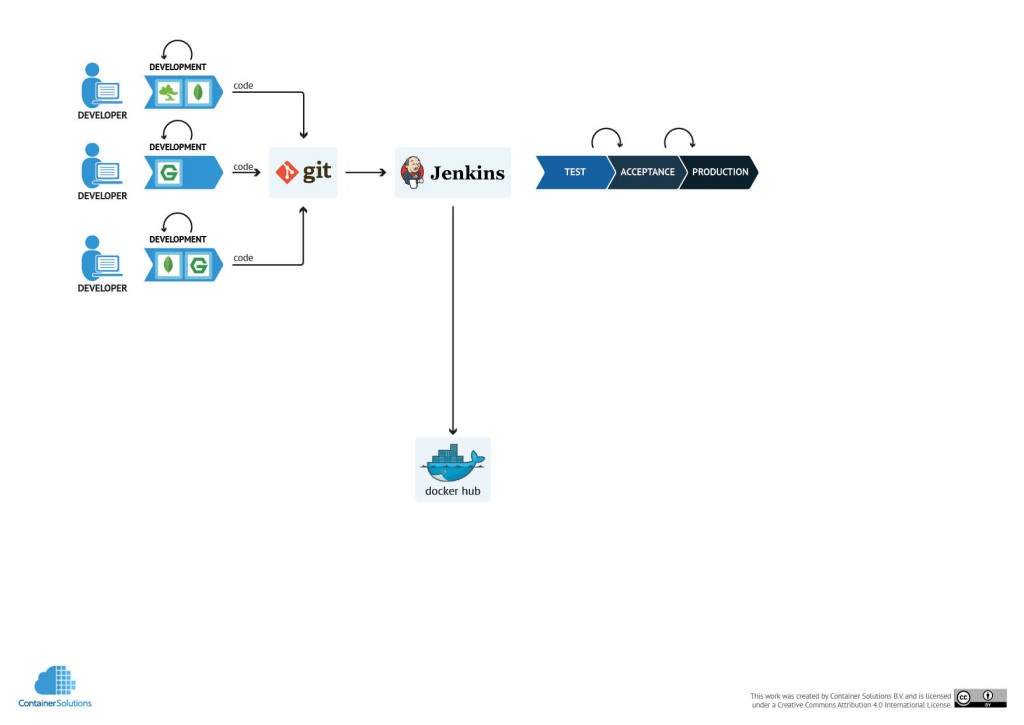
At this step we need to have a Version Control system and a build server to pickup the changes and run the build and tests. We will use Jenkins for this purpose, and also for publishing the built artefacts to an artefacts repository. In our case we are using Docker for the deployment, therefore the final artefact will be a Docker image with our application and it will be pushed to a local Docker Registry once it's ready.
At this point I make another shortcut. I won't be using a git repository management tool like GitLab or GitHub to reduce complexity. Connecting Jenkins to Git server is a common task that most of configuration managers can perform in their sleep. If you would like to deploy a Git server in Docker, you can use this one for GitLab: https://registry.hub.docker.com/u/sameersbn/gitlab/
Now, let's start building up our docker-compose.yml. Docker Compose will be used here as an orchestration engine to deploy all central services in a single command.Docker Compose is a development tool and should be replaced with more complex automation before setting up a real production system.
A few days ago Docker released the first version of Docker Compose, which will replaceDocker Compose. I didn't test it yet, but Docker Compose should be a drop in replacement forDocker Compose with little to no changes.
Here is the docker-compose.yml for setting up local Docker registry:
registry:
  image: registry
  environment:
    - STORAGE_PATH=/registry
  volumes:
    - registry-stuff:/registry
  ports:
    - "5000:5000"
It uses standard the Docker registry image and mounts one volume for persistent storage outside the containers. This is need to keep the built images after we restart the container.
After running
docker-compose up
We should have Docker Registry running on http://localhost:5000
The next step is to build an image and and push it to the registry.
# Build an image
docker build -t localhost:5000/containersol/nodejs_app .
# Push it to the registry
docker push localhost:5000/containersol/nodejs_app
At this point you will get the following error from the docker daemon:
Forbidden. If this private registry supports only HTTP or HTTPS with an unknown CA certificate, please add --insecure-registry 10.0.0.26:5000 to the daemon's arguments.
The solution for this can be found at this StackOverflow page
The quickest and easiest solution is to add the following line to /etc/default/docker and restart the docker daemon:
DOCKER_OPTS="--insecure-registry localhost:5000"
After you fix this issue and push the image to the repo, you can go to this URL to check that your image was successfully pushed: http://localhost:5000/v1/repositories/containersol/nodejs_app/tags/latest
Next we can add Jenkins setup to our docker-compose.yml file and restart the system:
jenkins:
  image: containersol/jenkins_with_docker
  volumes:
    - jenkins-stuff:/var/jenkins_home
    - .:/var/jenkins_data
    - /var/run/docker.sock:/var/run/docker.sock
    - /usr/bin/docker:/usr/bin/docker
  ports:
    - "8081:8080"
registry:
  image: registry
  environment:
    - STORAGE_PATH=/registry
  volumes:
    - registry-stuff:/registry
  ports:
    - "5000:5000"
The Jenkins setup requires some explanation. First, I'm using a common trick for mounting the docker binary and the socket used by docker daemon inside the Jenkins container. This is needed to allow Jenkins to run docker commands on the host from within the container. The problem is, that only users in the docker group have access to it and the Jenkins container runs with the jenkins user rather than the root user. For this reason I'm building my own Jenkins image using the following Dockerfile:
FROM jenkins

MAINTAINER ContainerSolutions

USER root
#TODO the group ID for docker group on my Ubuntu is 125, therefore I can only run docker commands if I have same group id inside.
# Otherwise the socket file is not accessible.
RUN groupadd -g 125 docker && usermod -a -G docker jenkins
USER jenkins
Run this command inside the folder with the Dockerfile above, to build the image:
docker build -t containersol/jenkins_with_docker .
This is an ugly hack that I would love to replace with a better solution at some point. If you have easy answer for me, please comment on the post.
You can also see that Docker Compose will create persistent storage for Jenkins container and mount current folder inside the container. This will be needed later when we will run build, push and deploy scripts.
To finish the continuous integration part of the setup we need to add couple of small scripts for building and pushing docker images and configure Jenkins to run them.
build.sh with the addition of an image version. Every Jenkins build will create a new tag for the docker image in the same way as we would do with other build artefacts. To clarify - I'm not claiming that this is the right way to do versioning. It is a very complex topic and I might write about it some other time, but for now I'll just skip the lengthy explanations.
#!/bin/bash

if [ -z "${1}" ]; then
   version="latest"
else
   version="${1}"
fi

cd nodejs_app
docker build -t localhost:5000/containersol/nodejs_app:${version} .
cd ..
Pay attention to the name of the built image. It includes first the URL of the registry, than the full name of the image and then the tag.
Also, it is worth mentioning that Jenkins is running inside container and will use this script to build the image, but the docker commands executed within Jenkins container will actually run on the host due to the mounting of the socket used by Docker.
push.sh will push the image build in the previous step. It will use the same version as the previous script.
#!/bin/bash

if [ -z "${1}" ]; then
   version="latest"
else
   version="${1}"
fi

docker push localhost:5000/containersol/nodejs_app:"${version}"
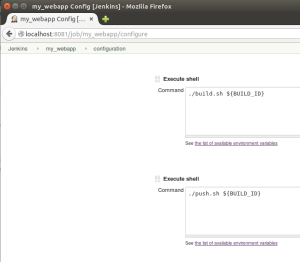
The last step to finish continuous integration is to restart the system using Docker Compose and configure a Jenkins job that will run build.sh and push.sh. Jenkins is running at the URL http://localhost:8081
It will be just a standard build bob that will execute two shell commands with build version as a parameter
./build.sh ${BUILD_ID}
./push.sh ${BUILD_ID}
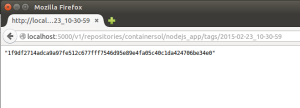
Now we can execute the build and see our new image deployed to the registry. Note that this URL includes the new tag
In Part 1, I showed how to dockerize a node.js application on the development machine and deploy Jenkins and the Docker registry for continuous integration of the node.js app.
In Part 2 I will continue the setup for Mesos and Marathon and complete the Continuous Delivery cycle.



 Previous article
